Iron On Embroidered Patches for Jeans: Step-by-Step Application Guide
By sunny season patches
October 24th, 2025
256 views
Iron On Embroidered Patches for Jeans: Step-by-Step Application Guide
Transform your favorite denim into a personalized fashion statement with our comprehensive guide to applying iron-on embroidered patches.
Few DIY fashion projects offer the perfect blend of creativity, customization, and functionality quite like iron-on embroidered patches on jeans. Whether you're looking to breathe new life into old denim, cover a worn spot, or simply express your unique style, this technique delivers professional-looking results with minimal tools and time. Unlike sew-on alternatives that require needlework skills, iron-on patches utilize a heat-activated adhesive backing that bonds securely to fabric when properly activated.
The appeal of patches on jeans spans generations, from the rebellious spirit of punk rock to today's personalized fashion trends. They allow you to create a wearable canvas that tells your unique story while extending the life of your favorite denim. This comprehensive guide will walk you through the entire process—from selecting the right materials to long-term maintenance—ensuring your customized jeans remain vibrant and secure through many wears and washes.
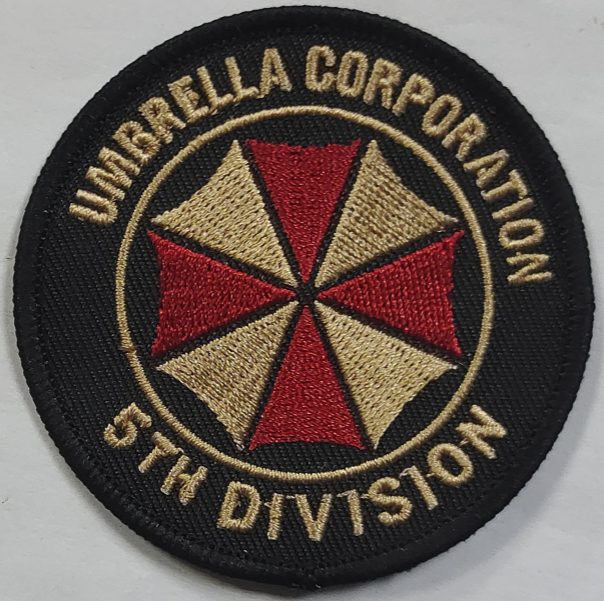
Why Choose Iron-On Embroidered Patches?
Iron-on patches combine convenience with professional results. Their heat-activated adhesive backing means you can achieve a secure bond without any sewing expertise, making them ideal for quick DIY applications. The simplicity of application means you can transform a pair of jeans in minutes rather than hours.
The benefits extend beyond mere convenience:
-
Time-efficient transformation: No sewing means you can customize multiple pairs of jeans in a single session
-
Professional finish: When properly applied, the patches lie flat with clean edges that resemble professionally applied emblems
-
Versatile designs: Available in countless shapes, sizes, and colors to match any personal style or theme
-
Durability: High-quality patches withstand regular washing when applied correctly to stable fabrics like denim
Compared to fabric glue or stitch-on alternatives, iron-on patches offer the optimal balance of ease-of-use and longevity, especially when working with sturdy denim fabric that can withstand the heat required for proper adhesion.
Materials You'll Need
Gathering the right materials before starting ensures a smooth, successful application process. You'll need:
-
Iron-on embroidered patches of your choice
-
Jeans (clean and completely dry)
-
Household iron (with adjustable temperature settings)
-
Thin cloth or parchment paper (as a protective barrier)
-
Hard, heat-resistant surface (ironing board or wooden table covered with a towel)
-
Optional but recommended: Needle and thread for extra reinforcement
Important considerations for materials: Ensure your iron has a steam function so you can turn it off completely during the process, as moisture interferes with the adhesive bonding. Avoid using soft surfaces like beds or couches, which absorb heat unevenly and prevent the consistent pressure needed for proper adhesion. If working with particularly valuable or delicate denim, test a small patch in an inconspicuous area first to ensure compatibility.
Pre-Application Preparation
Proper preparation significantly impacts the final result and longevity of your patch application. Follow these preliminary steps carefully:
1. Wash and Dry Your Jeans
Start with clean jeans by washing them to remove any dirt, oils, or residues that might hinder the adhesive from bonding properly. This step also pre-shrinks the denim, reducing the risk of patches warping or peeling after future washes. Ensure jeans are completely dry before proceeding, as applying patches to damp fabric leads to poor adhesion.
2. Create a Smooth Surface
Iron the area where you plan to place the patch to remove wrinkles or creases. This provides a flat, stable base for the patch to adhere to seamlessly. Inspect the area and remove any lint or debris with a lint roller or tape .
3. Plan Your Patch Placement
This creative decision impacts the overall aesthetic of your customized jeans. Consider these popular placement options:
-
Pockets (front or back): Offers high visibility and serves as a focal point
-
Knees: Creates a trendy, urban look, especially effective for distressed denim
-
Thighs or hips: Provides a larger canvas for statement patches or groupings
-
Vertical stripes along outer seams: Creates a slimming effect and unique silhouette
When working with multiple patches, lay them out first to achieve a balanced, cohesive look. Consider color coordination between patch colors and your jeans' wash—contrasting colors make patches pop, while monochromatic schemes offer subtlety. Once satisfied with your arrangement, you can lightly mark the positions with tailor's chalk or pins.
Step-by-Step Application Instructions
Follow these steps carefully for a secure, professional-looking patch application:
Step 1: Preheat Your Iron
Set your iron to the cotton or high-heat setting (approximately 160-180°C or 320-356°F). Ensure the steam function is turned off, as moisture prevents proper adhesive activation. Allow the iron to heat completely before proceeding—an inadequately heated iron won't activate the adhesive effectively.
Step 2: Position the Patch
Place your jeans on the ironing board, ensuring the target area is smooth and flat. Position the patch adhesive-side down (shiny side against the fabric) in your desired location. Double-check placement carefully, as repositioning after heating is difficult and may damage the fabric.
Step 3: Cover With Protective Layer
Place a thin cloth, towel, or parchment paper over the patch. This protective barrier serves two crucial functions: it prevents direct contact between the iron and patch (which could damage the embroidery), and it ensures even heat distribution across the entire surface.
Step 4: Apply Heat and Pressure
Press the hot iron firmly down on the protected patch, maintaining steady pressure for 30-45 seconds. Avoid moving the iron back and forth—consistent, stationary pressure ensures even heating. For larger patches, you may need to lift the iron and repress different sections to cover the entire area.
Step 5: Flip and Iron the Reverse Side
Turn the jeans inside out and iron the area directly behind the patch for an additional 30 seconds. This crucial step ensures heat penetrates from both sides, creating a significantly stronger bond between the adhesive and denim fibers.
Step 6: Cool Completely
Allow the patch and fabric to cool completely (5-10 minutes) before moving or wearing the jeans. This cooling period allows the adhesive to fully set and harden. Rushing this step may result in poor adhesion.
Step 7: Test Adhesion and Reinforce (Optional)
After cooling, gently test the edges of the patch with your fingernail. If any sections lift, reapply heat to those areas. For items that will undergo frequent washing (like jeans), consider adding a few hand stitches around the perimeter for extra security. This optional reinforcement ensures maximum durability.
Table: Troubleshooting Common Application Issues
|
|
|
|
|
|
|
Reheat iron and apply pressure for full 45 seconds
|
|
|
|
Focus heat on lifting areas, use more consistent pressure
|
|
|
|
Use lower temperature or thicker protective cloth
|
|
|
|
Always use cloth/parchment between iron and patch
|
|
Patch shifting during application
|
|
Keep iron stationary during heating process
|
Pro Tips for Long-Lasting Results
Beyond proper application, these expert tips will extend the life of your customized denim:
For Maximum Durability: If your jeans undergo frequent washing (especially workwear or children's clothing), reinforce ironed patches with a few hand or machine stitches around the perimeter. This hybrid approach combines the ease of iron-on application with the security of sewing.
Washing and Drying Care:
-
Wait at least 24 hours after application before the first wash to allow the adhesive to fully stabilize
-
Turn jeans inside out before washing to protect patches from abrasion
-
Use cold water on a gentle cycle with mild detergent
-
Avoid high-heat dryers—air drying preserves both the denim and adhesive bond
-
If using a dryer, select the lowest heat setting and remove while slightly damp
Periodic Maintenance: Check patches periodically for loose edges. If noticed, reapply heat with a protective cloth for 15-20 seconds to reactivate the adhesive. Avoid ironing directly on the patch surface during future ironing sessions.
Creative Ideas and Inspiration
Beyond practical repairs, patches offer endless creative possibilities for personal expression:
Thematic Storytelling: Create a cohesive narrative by selecting patches that follow a theme—musical instruments, natural elements, retro logos, or celestial motifs. This approach transforms your jeans into a wearable storybook of your interests.
Strategic Placement Combinations:
-
Symmetrical balance: Mirror patch placement on both legs (e.g., identical patches on both knees)
-
Asymmetric interest: Place different but complementary patches in non-matching positions
-
Focal points: Cluster smaller patches around a larger central design for visual hierarchy
-
Unexpected placements: Try the back of the calf, above the ankle, or along the back yoke
Practical Artistry: For jeans with holes, place the patch underneath the opening and iron from both sides. This creates a "window" effect where the patch peeks through the denim, simultaneously repairing and decorating .
When selecting patches, consider how their colors, sizes, and styles interact with your jeans' wash and cut. Darker denim provides a bold backdrop for bright patches, while light-wash jeans offer a vintage-inspired canvas for more subdued designs.
Conclusion
Applying iron-on embroidered patches to jeans is a rewarding DIY project that blends creativity with practicality. By following these detailed steps—from proper preparation through careful maintenance—you can transform ordinary denim into personalized wearable art that reflects your unique style and interests.
The process requires patience and attention to detail, but the satisfaction of wearing jeans you've customized yourself is well worth the effort. With the right materials, technique, and care, your patched jeans will maintain their vibrant personality through many wears, becoming a cherished part of your wardrobe that tells your story with every wear.
Have you tried applying iron-on patches to your jeans? Share your creations or questions in the comments below!
Previous
How to Communicate Your Design to Embroidered Patches Manufacturers Clearly
Read More
Next
2025 Trendy Embroidered Patches: Cartoon & Vintage Styles You Must Have
Read More


